Wednesday, November 13, 2013

Whistlestop Junction

 Whistlestop Junction
(Bar Mills Models)


I had a busy week of building models while I had some time in LA, this is the Whistlestop Junction made by Bar Mills.


The roofing shingles on this model were applied as individual rows, and while the corner in the roof was a little difficult it came out looking great.


A great thing about this Bar Mills model was that it came with all sorts of small detail parts that really make the building look so much more complete.


Saturday, November 9, 2013

Roscoe Store

Roscoe Store
(Branchline Trains)


I have been busy here while in LA.  This is the first of a few of the buildings I was able to mostly complete.  Im not really sure where on the layout it is going to end up, but once it gets home, it needs some store interiors place in the store fronts, and then can find a home on the layout.


While every model seems to have a slightly different method for the roof, I was very disappointed with the roof on this Branchline model.  It may take what seems like a year and a half to apply each row of the laser cut shingles, it looks much better than this molded roof that came with the Roscoe Store.  Everything else about the model is very much what I wold expect from Branchline.


I have already added a base to the model and set up the woodland scenic checkers players outside.  Now a little weathering and the interiors and this model is good to get place on the layout.  Well all of that and about a 1500 mile trip back to Kansas City.

Thursday, November 7, 2013

Layout Expansion!!

Massive expansion of the layout!!

It has been quite awhile since we have really posted anything, but I was able to be home for a few weeks that past July and just worked non stop on the layout.  Once we got a difficult switch machine installed at the start of our incline leading to Sedalia, all sorts of things started falling into place.

Jefferson City Industrial District
and Grain facility on Left
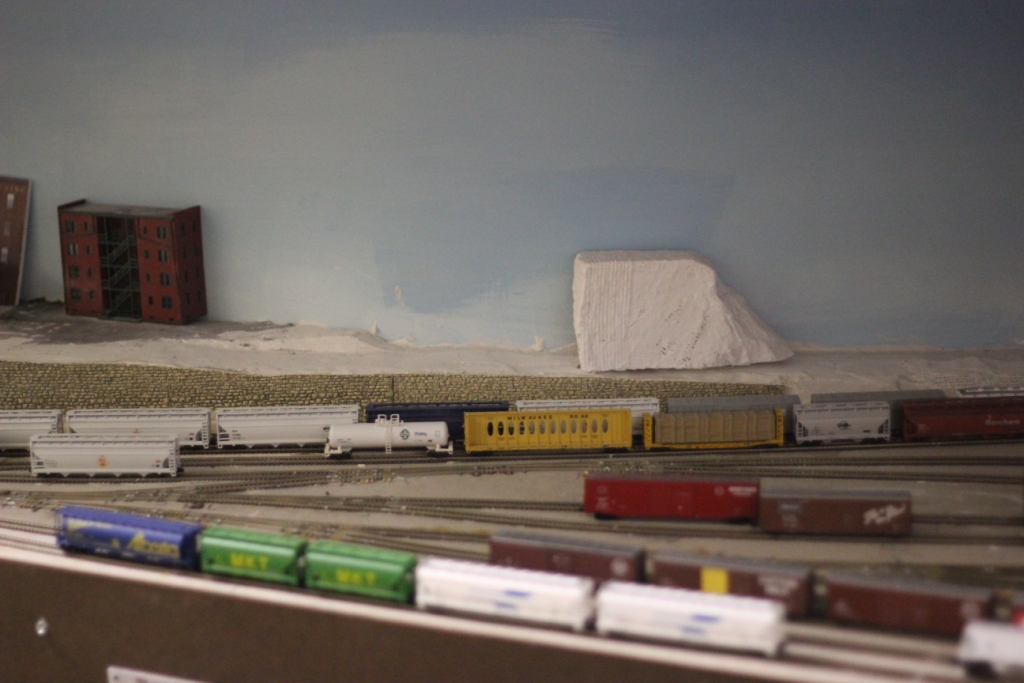
Jefferson City Yard
Bridges crossing over river
toward Sedalia
Sedalia Mining on right,
Sedalia industry will be on left


Helix Construction to get to second level


Warrensburg, MO

A small area at the top of the helix with enough space for a siding and a station is all that Warrensburg consist of, but it adds a nice scenic spot while the train finishes its climb to the second level.


Pleasant Hill, MO

This town on the layout with have a few different industries; Grain, Petroleum, and a yet to be determined warehouse.


Lees Summit, MO (sorta)

We wanted to put our town on the layout, but really its only there in spirit.  Between Pleasant Hill and Independence we are putting a small farm scene on the end of the peninsula and calling it Lees Summit.


Independence, MO

While only taking up a small area on the layout, Independence will have two industries; a oil facility and LaFarge.


Kansas City, MO

Continuing around you enter Kansas City.  The first area will become a industrial district, followed by the KC yard, and finally near the yard will be some industries served via the yard.


Friday, May 31, 2013

LED Layout Lighting

It started with a discussion between my father and myself three years ago about whether or not it would be possible to use led lighting to light a layout efficiently. Through much experimentation with led options from suppliers I have worked with in the past for other projects, we finally found a solution that is effective for lighting they layout and remaining cost effective.

What we obtained was many 5 meter rolls of a Flexible SMD LED Tape with 5050 SMD LEDS on it in a daylight white.  There are many colors available and multiple color temperatures of white, we settled on the day light vs two other color temperatures because the others were more yellow or blue than we liked for the layout look.  SMD LEDs are also available in 3528s instead of the 5050, but only provide about 1/3 as many lumens, although the 3528 tape is going to work very well inside some of the buildings.


To install the LED Lighting I ran a 12v bus line around the top of the layout.  Now that I had the 12v power throughout the layout I began to plan how I would cut the LED tape to best cover the entire layout.  We decided that only applying the tape in straight lines vs attempting to follow the curves of the layout was the most effective way. We attached an 1/8" masonite hardboard stip to the framing for the upper level of the layout and applied the LED tape directly to the smooth side of the masonite. 


We applied a stip of the LEDs about 2" from the front of the layout and then a second strip about 6 inches from the back of the layout to give us the best coverage thoughout.  In some of the deeper areas of the layout we added a third strip in the middle.  In one of the pictures you can see another strip of the LEDs applied to the back side of the facia, These are an RGB version of the 5050 SMD LEDs that we have been experimenting with to add color differences to our backdrop to represent different times of day.  We are very happy with our current results and the LEDs have been installed now for almost 3 months with out any issues.


There are a few major benefits to LED lighting that led us to start experimenting with options;

Power - we are able to light our entire layout while only using less than 10 amps

Heat - while the traditional method of lighting for a layout has always been incandescent or fluorescent lighting, both methods produce a great deal of heat.  After hours of operation with the LEDs on at full, they are still cool to the touch, making it great for a room that has multiple bodies in it already to operate the layout.  We're happy to have to run the airconditioner a little less to keep the room comfortable.

Installation - installation was a breeze, we managed to put up lighting on the entire lower level in less that an hour.  The 12v power supply for the LEDs lives near our DCC command station and has 16g bus wires that run up behind the backdrop and around the layout.  To attach each strip of LED lights, I simply soldered on a couple feeder wire to the (+) and (-) pads on the strip itself and then use 3M "suitcase" connectors to attach them to the bus wires.


Wednesday, May 22, 2013

Norfolk Southern - Illinois Division

This may seem a bit of a tangent from any normal post that show up here, especially since the blog is titled, Missouri Pacific Sedalia, but this will be a running tangent for awhile.  The Missouri Pacific Sedalia Sub is a model layout that is built by myself (Stephen) and my father (Gary).  I travel for a living with Broadway tours and get to spend generally less that two months a year here, thus I don't get to work on stuff very often.  When I am home it is generally for a week at a time and model railroading does get the majority of my time. Knowing that at some point in the near future I will get tired of traveling all the time, want a house of my own, family... I have recently started planning my future layout.


After a few months of debate about which direction I wanted to go with my future layout, I had finally decided on Norfolk Southern.  While I have a great deal of Union Pacific and Missouri Pacific locomotives and rolling stock, my interest in a coal branch through the hills and forrest is something that I will always have and if I don't make the switch now, it will probably be something that I regret.  I eventually decided on the Norfolk Southern Illinois Division between Moberly, MO and Huntingburg, IN, with Kansas City, MO and Louisville, KY as staging yards.  Also to satisfy my need to haul coal, there are 4 coal mines in Southern Illinois that while they may not truly be served by the NS, I am making them so for a coal branch on my layout.


From time to time I will post some of the projects that I am working on or have completed for this layout on this blog, but most of the Illinois Division stuff will be solely posted on its own blog.